
Page Theme Custom Website Menu
See also Page Themes
This is an overview of the custom website menu functionality. It is a companion option to the responsive page themes for designing a menu of navigational options.
Creating a Custom Website Menu
The custom menu is used to add menu navigational tabs to specified pages. By default, page themes do not contain menu tabs. A custom menu can be assigned to a page theme if desired, but it is not required.
Manage your custom website menus under Interface > Custom Website Menu. Click New Custom Menu.
- Enter a Menu Name
- Enter the Display Text that shows when the menu is collapsed, such as a Slide Menu.
- Select the pages that you want the menu to display on.
- Click Add Custom Menu to save your changes. You can return to this menu at any time to add Menu Items and complete the setup.
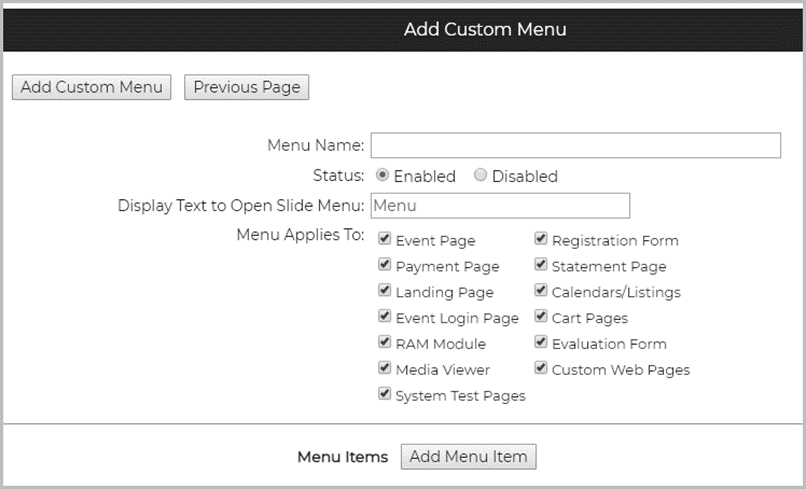
When adding or editing a custom menu, your page will look like this:
Display Text to Open Slide Menu – Menus can either be built into the page itself or accessed through a menu option on the page. This is where you can specify the text that will be used to open the menu.
Menu Applies To – Pick which pages the menu will be applied to (assuming this menu is attached to the theme you are viewing the page with). You can have the menu appear everywhere for consistency. Alternatively, if you wanted to keep the registrant on track during registration and payment, you might choose to turn the menu off for those pages. Or, you may simply want to build a menu with several custom web pages.
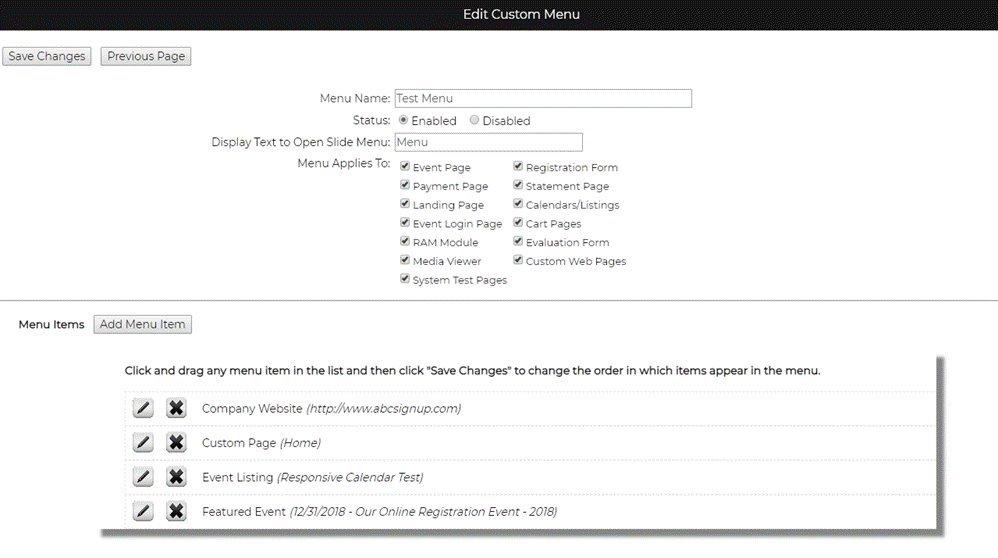
Menu Items – You can add/edit/delete all the menu items in your custom menu or drag and drop them to arrange the order they need to appear.
Creating a Menu Item
Click Add Menu Item. Enter the Menu Item Text to display and select the Menu Item Link type that you would like to add. Click Add Custom Menu Item to save your changes for that menu item.
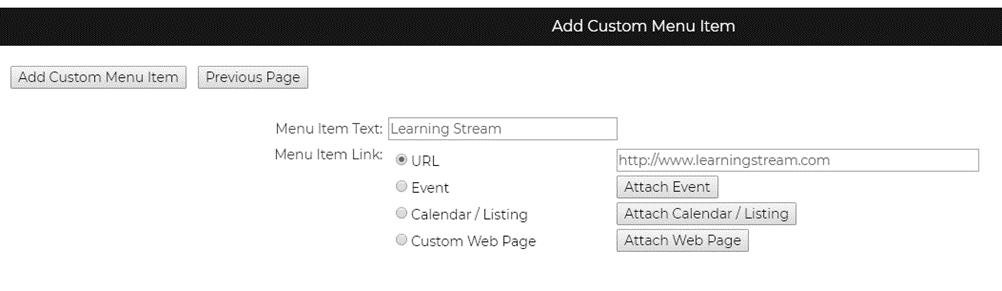
Menu Item Text – This is what will be displayed in the menu for this option.
Menu Item Link – This will specify where the user will be taken to, it can be one of four things.
- URL: Enter any valid URL
- Event: Pick an event in Learning Stream and the menu will build in the correct link
- Calendar/Listing: Pick a calendar in Learning Stream and the menu will build the correct link. We will want to use this cautiously and not create a setup where users are jumping between calendars. We may even want to go so far as to limit menus to only one Calendar/Listing option.
- Custom Web Page: Pick a custom web page in Learning Stream and the menu will build the correct link.
Attaching a Menu to a Theme
Under Interface > Page Themes, then click edit next to your page theme. On the Headers & Footers tab of the theme setup, there will be a section where the admin can pick a Custom Menu to attach to the theme and select how they would like that menu to be integrated into the page.
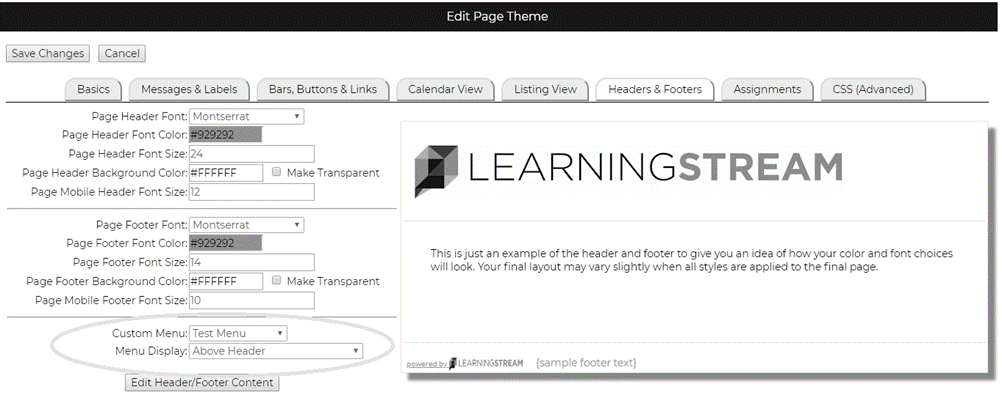
There are 5 options on how to integrate the menu into the page. The following is a brief description and screenshot on each. Note, where you see the word “Menu” is where the “Display Text to Open Slide Menu” value from the menu setup is being used.
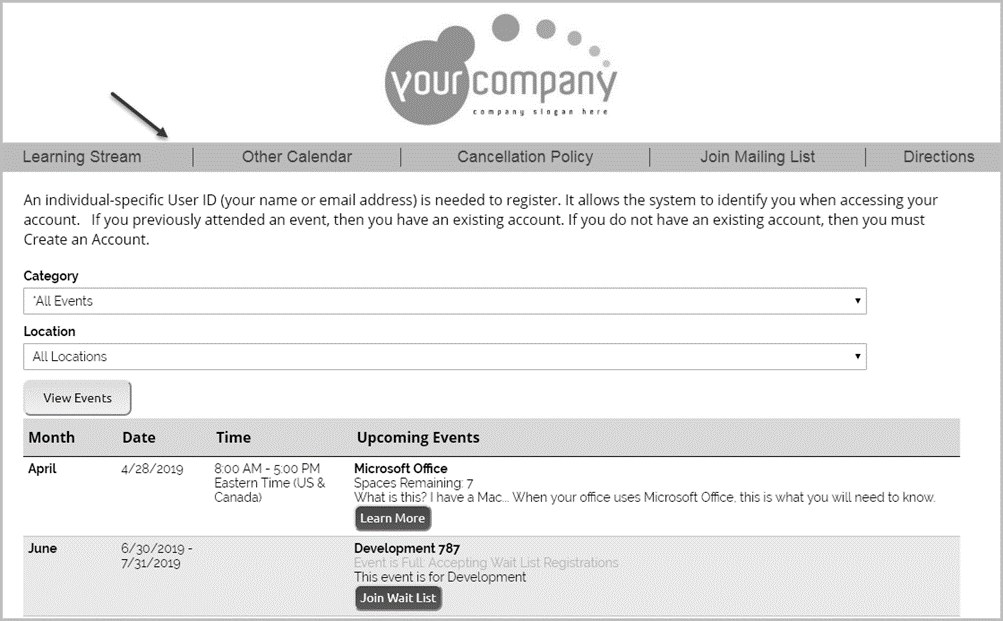
Below Header – Your menu will display below the page header. When the screen size is small enough to switch to a mobile display, the page will display an option to open a slide menu instead of the list of menu items. This is better suited to a menu with only a few options.
Regular Display

Mobile Display

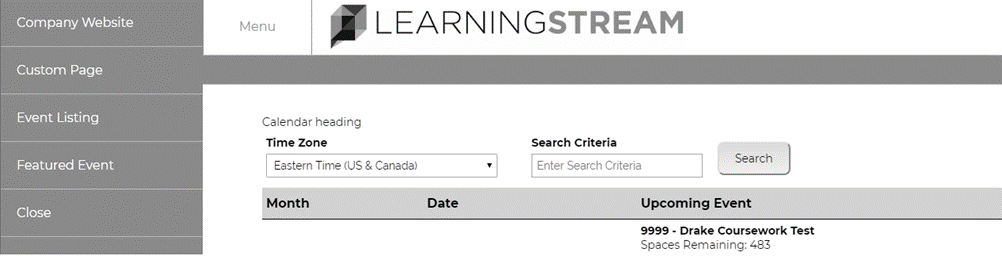
Above Header – Your menu will display above the page header. When the screen size is small enough to switch to a mobile display, the page will display an option to open a slide menu instead of the list of menu items. This is better suited to a menu with only a few options.
Regular Display

Mobile Display

Slide Out From Header – Left – A menu option will be built into the left side of the page header and using it will slide out a menu from the left side of the screen. This would be better suited for menus with more options that would not fit if displayed horizontally across the screen like the previous options. The regular and mobile displays are essentially the same.
Initial Display

Display When Menu is Opened
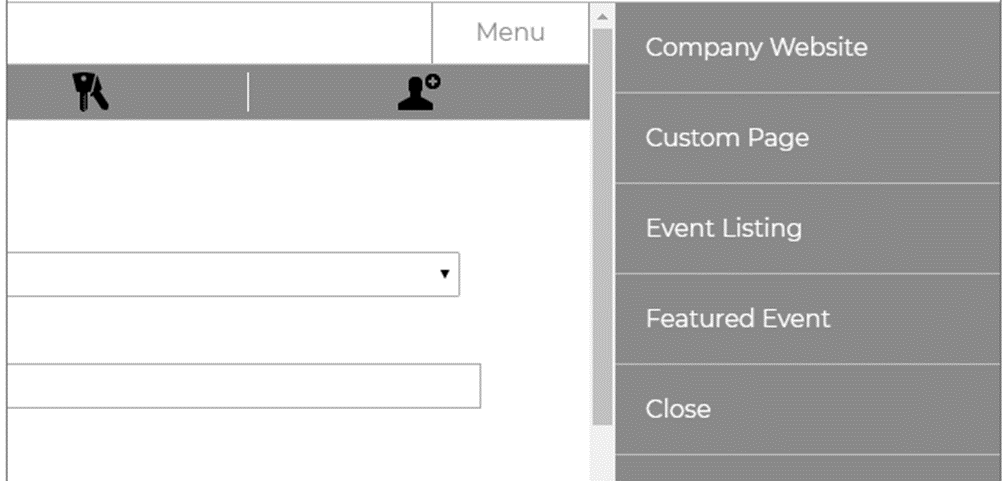
Slide Out From Header – Right – A menu option will be built into the right side of the page header and using it will slide out a menu from the right side of the screen. This would be better suited for menus with more options that would not fit if displayed horizontally across the screen like the previous options. The regular and mobile displays are essentially the same.
Initial Display

Display When Menu is Opened
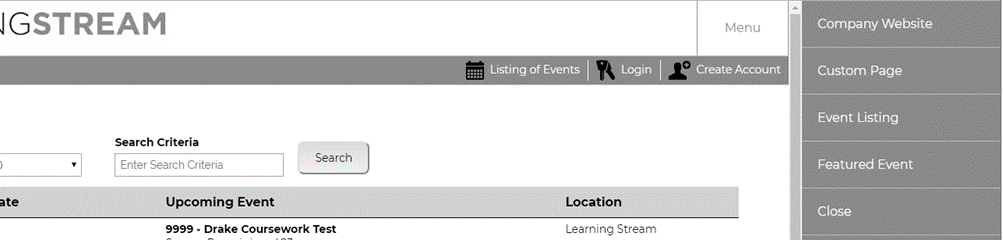
Inline With Header – The menu will be built horizontally into the header on the right hand side of the screen. When the screen size is small enough to switch to a mobile display, the menu will collapse into a single menu option similar to the “Slide Out From Header – Right” display. This is better suited to a menu with only a few options.
Regular Display

Mobile Display

Display When Menu is Open
Comments
0 comments
Article is closed for comments.